In the dynamic world of online retail, being able to communicate product availability in a personalized and effective way can make all the difference. To help WooCommerce store owners achieve just that, the Woo Custom Stock Status Pro plugin now offers a new and powerful feature — Creating Your Own Stock Status.
This feature gives you full control over your product stock messaging by allowing you to define and display custom stock status labels tailored to your business needs.
Why Custom Stock Status Matters:
The default stock messages like “In Stock” or “Out of Stock” often aren’t enough to convey the full picture. You might want to show messages like:
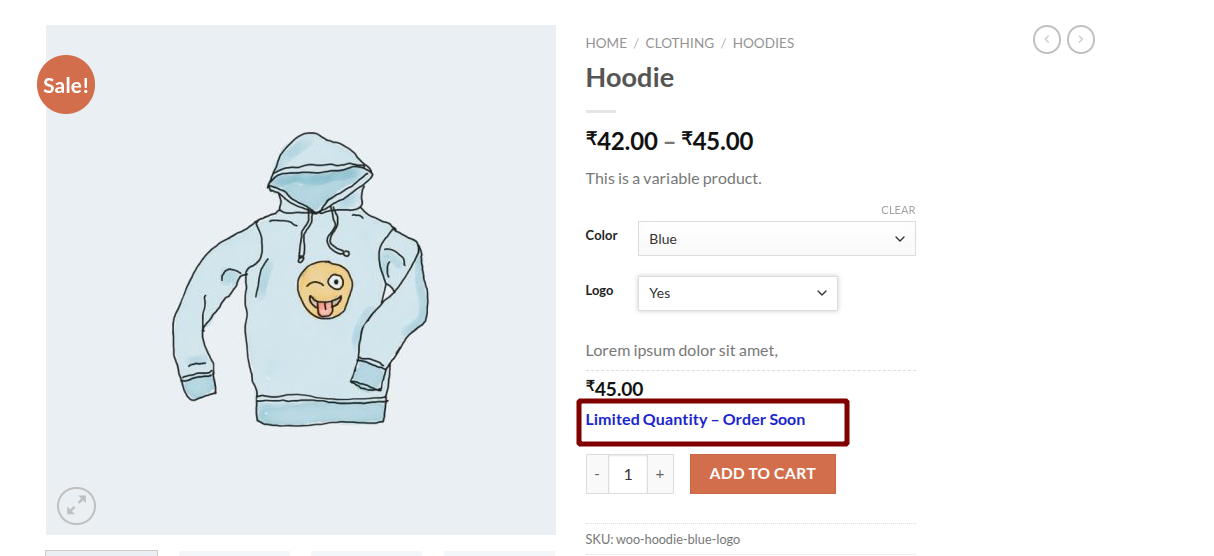
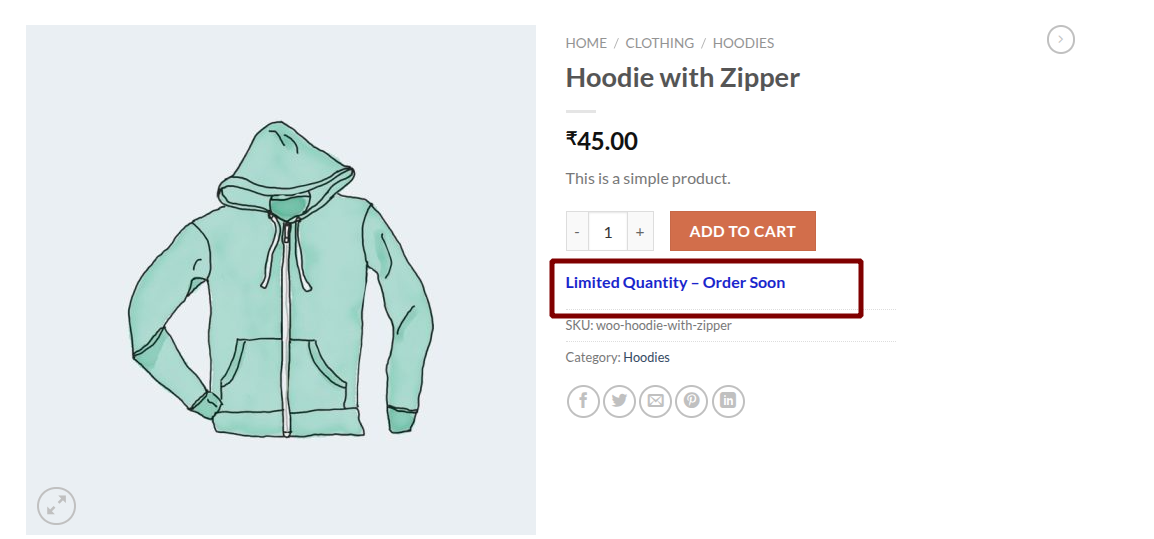
“Limited Quantity – Order Soon”
“Back in Stock Next Week”
“Ready for Internal Pickup”
“Custom Order – Ships in 3 Days”
With this new feature, you can now create these types of statuses and assign them globally or at the product level.
How to Create Custom Stock Statuses:
To get started:
-
Navigate to
WooCommerce > Settings. -
Click the Custom Stock tab.
-
You’ll see two sections: General and Stock Status.
-
Open the Stock Status tab.
Here, you’ll see:
-
Seven default stock statuses.
-
A button labeled Insert New Status at the bottom.
When adding a new status, you can:
-
Set a custom status label (e.g., “Coming Soon” or “Internal Use Only”).
-
Choose a color to help it stand out visually.
-
Adjust the font size for better visibility.
-
Choose whether to hide this status on the Cart page or Checkout page.
Once created, this custom status becomes part of the global stock status list.
Assigning Custom Status to Products:
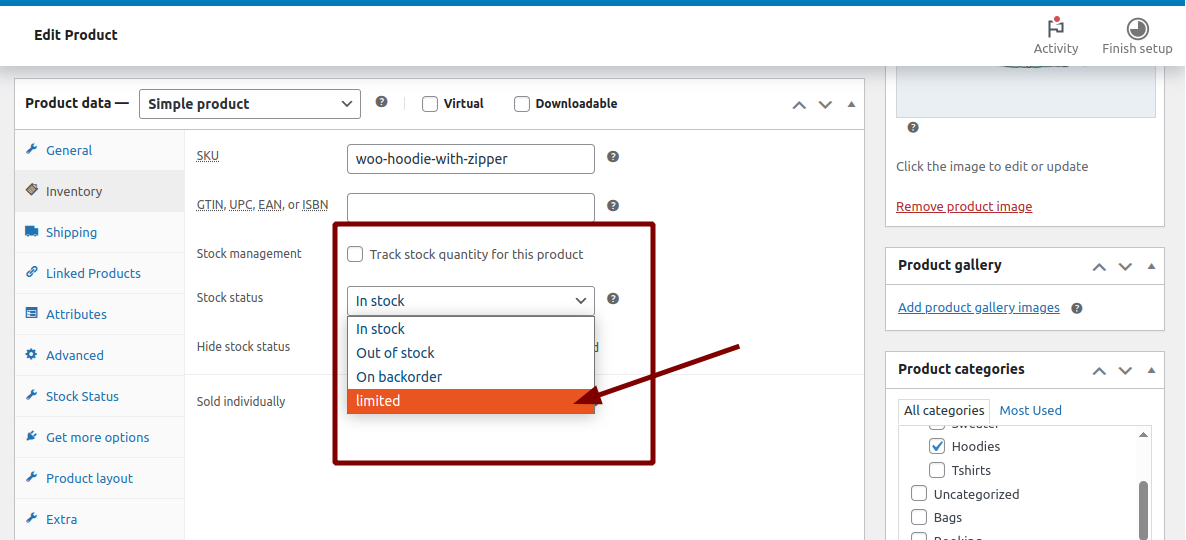
For Simple Products:
-
Go to the product edit page in WooCommerce.
-
Scroll to the Inventory section.
-
Uncheck the "Manage stock" option.
-
A Stock Status dropdown will appear.
-
Select the custom status you previously created.
-
Click Update to save the product.
? Note: You must create the stock status from the global settings first. It cannot be created from the product edit page.
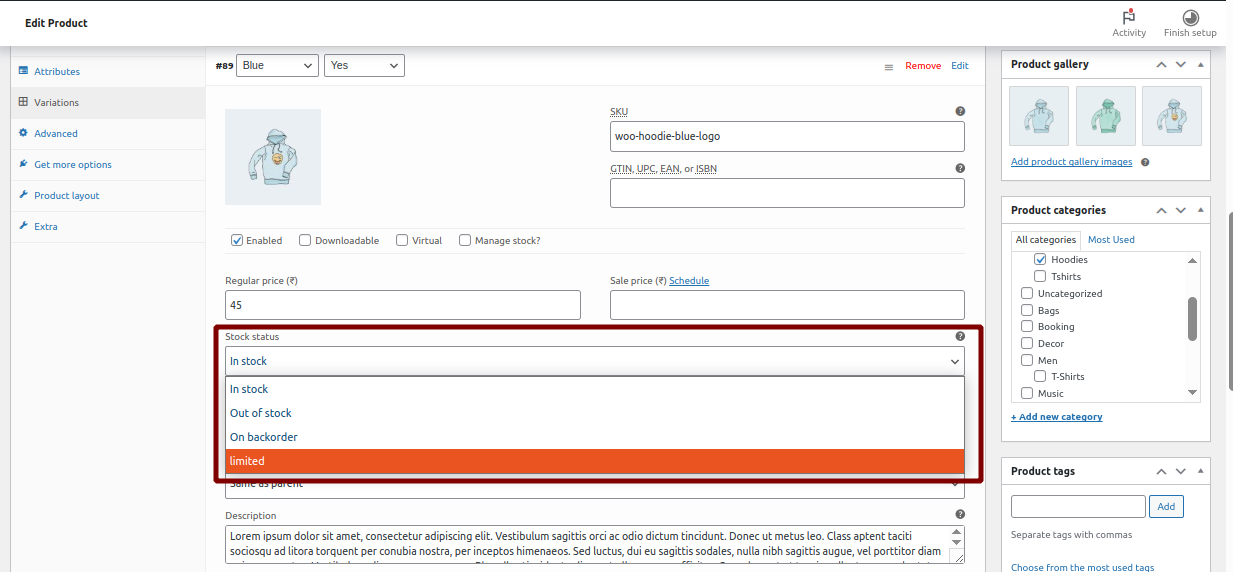
For Variable Products:
-
Open the Variations tab inside the product edit screen.
-
Select a variation to edit.
-
Uncheck the "Manage stock" checkbox.
-
You’ll now see the Stock Status dropdown.
-
Select your custom stock status from the list.
-
Click Update to save the variation.
Each variation can have a unique custom stock status, giving you granular control over how inventory messaging appears for each product option.
Benefits of the Feature:
-
Brand-Consistent Messaging
Customize the tone and style of your stock labels to match your store's branding. -
Improved Internal & Customer Communication
Use specific messages for staff (e.g., "For Internal Use Only") or create urgency for customers (e.g., "Almost Gone"). -
Enhanced User Experience
Clear, specific messages help reduce confusion and increase confidence during the shopping process.